

Guide to Using the EverSewn Sparrow X2 App
/Congratulations on starting your machine embroidery obsession! We’re all the way here for it. There’s a steep learning curve to machine embroidery and we want to be with you every step of the way. This article will be focused on how to use the EverSewn app with your Sparrow X2 sewing and embroidery machine. Please see our other articles on troubleshooting machine connection issues, a broad look at stabilizers, a more detailed look at stabilizers, and don’t miss our free patch designs!
EverSewn Advisory Board member and owner of Sew Beary Special, Marcie Brenner, put together this guide to the EverSewn app using screenshots from the app itself. Please note that each screenshot has notations explaining options. This information is highlighted in yellow on the app screenshots.
Opening the App
This is what you’ll see when you first open the EverSewn app along with descriptions of what each option is and how each option would be used.

Information and App Settings
This is what to expect when the tab on the left side of the app is accessed. This is where app settings and machine connection information can be found.

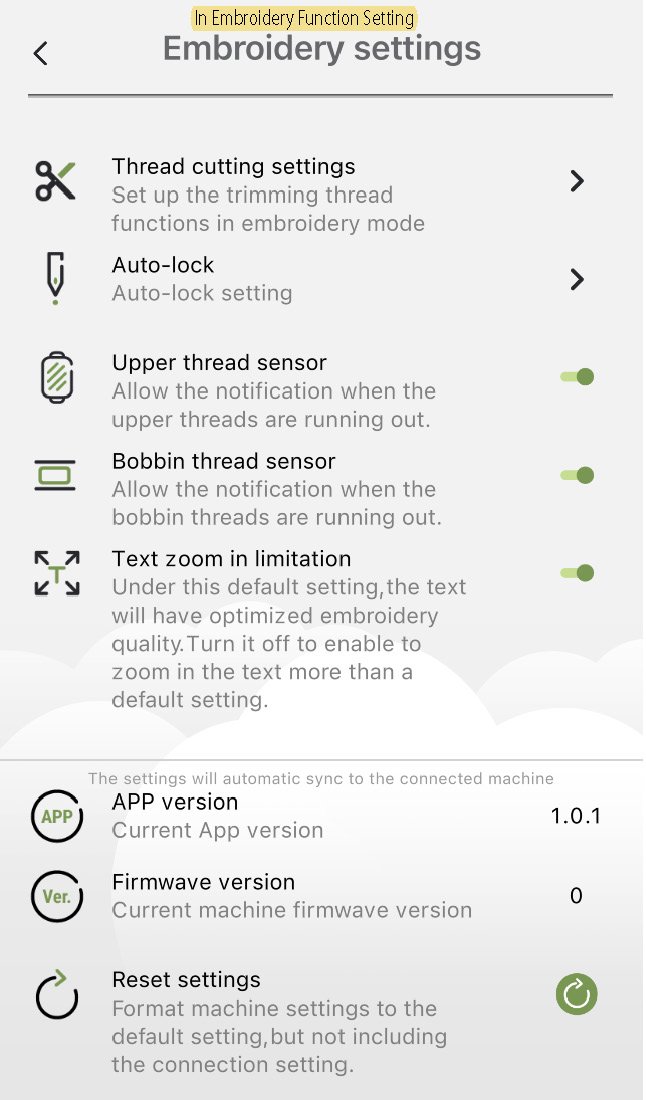
Embroidery Function Setting
Inside the Information and App Settings tab, there is an option to click on Embroidery Function Setting. This menu allows the user to select embroidery specific settings. These are typically settings that a more advanced user would adjust once comfortable with the basic functions of the app and embroidery machine.
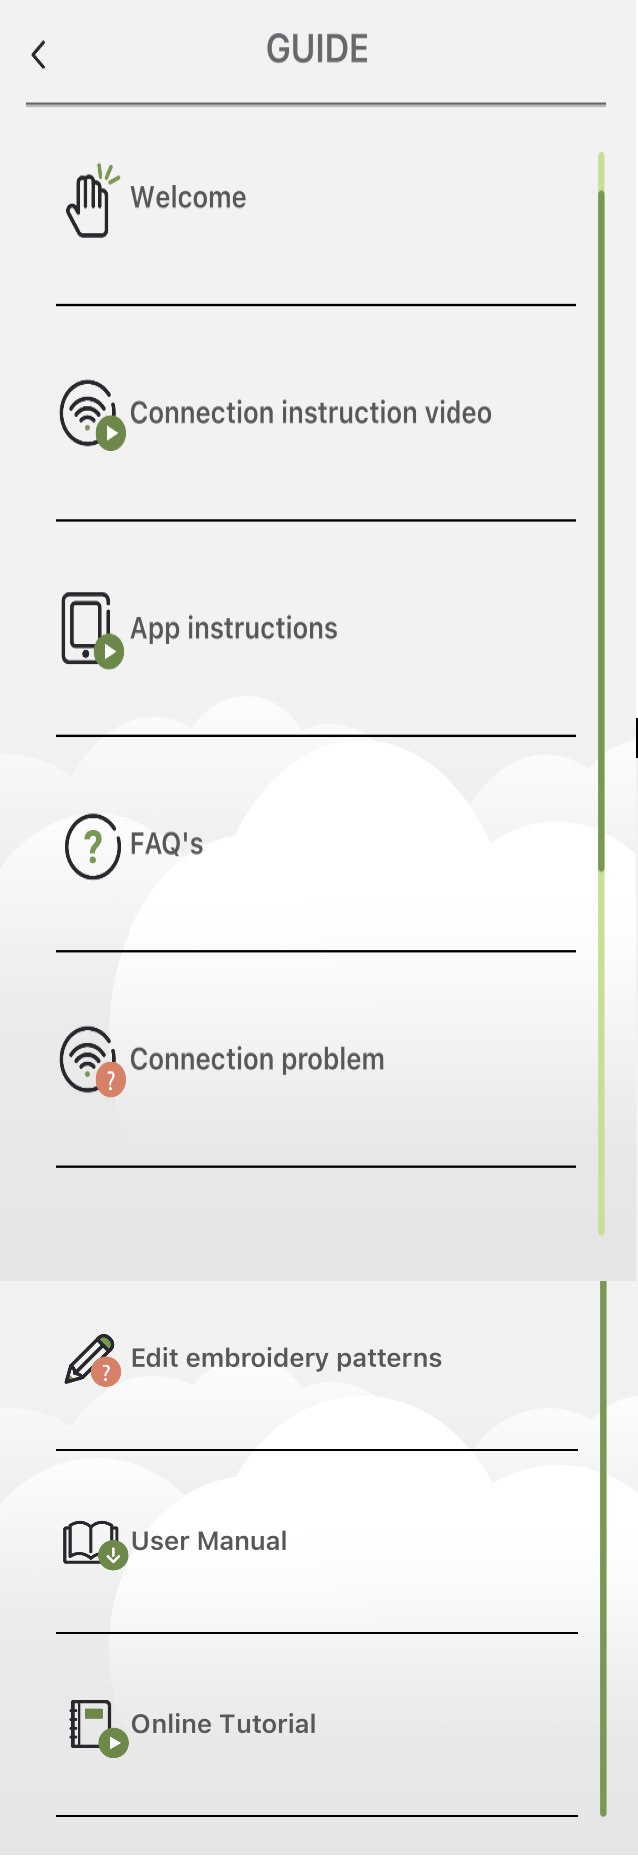
Instructions and App Guide
Also found inside the Information and App Settings tab is a guide and troubleshooting suggestions for the app. This is where you can find the complete manual for the EverSewn Sparrow X2 machine as well as an instruction video and frequently asked questions.
Adding a Design from the App Library
When the “Patterns” option on the home screen is selected, the user will be taken to a screen with several folders of designs that are included with the app. This is also where previously downloaded designs can be found. As an example, Marcie clicked into the folder titled “Animal” and the image below is a small sampling of the designs available in this folder.

Selecting a Design
In this example, Marcie chose the cat design. Once a user has clicked on the design of choice, a screen will appear with information about the design. In the image below, Marcie outlines what each item on this screen means. This information will be key to gathering supplies, such as the correct amount of colors needed to complete the stitch out.

Setting Up the Design
Once the design is selected, touch the pencil in the upper right corner to edit the design in the hoop. This is where you can add more design components and text as well as select thread color, change the stitchout order, and add a basting box.


Moving the Design
Let’s talk about what happens when you want to move your design within the hoop boundaries. There are easy to use arrows that will nudge the design right, left, up, and down. There’s also a convenient option to have the app center your design within the hoop. In this menu, you can also mirror your design vertically or horizontally.

Adding Components to the Design
If you’d like to add more components to your design, simply select the “Patterns” option and you’ll be given the choice to add design components from within the app or from files on your phone or tablet.

Using Downloaded Designs in the App
Speaking of pulling designs from your phone or tablet into the app, this is a great way to personalize your projects! There are many artists who sell digital embroidery files and we even have a selection of fun designs to upload into the X2 app! To upload a design into the app, choose “Input Files” on the app home screen. This will bring you to the files on your mobile device. The app recognizes the following file formats: .zhs, .pes, .dst, .jef, .xxx, .hus, .exp, .pec, .pcs, .sew, .vip, .vp3.
Below is an example of a design where two files are merged - this is a perfect way to express your creativity!

Then, using the text option on the bottom menu, you can add additional customization. Your imagination is the limit!

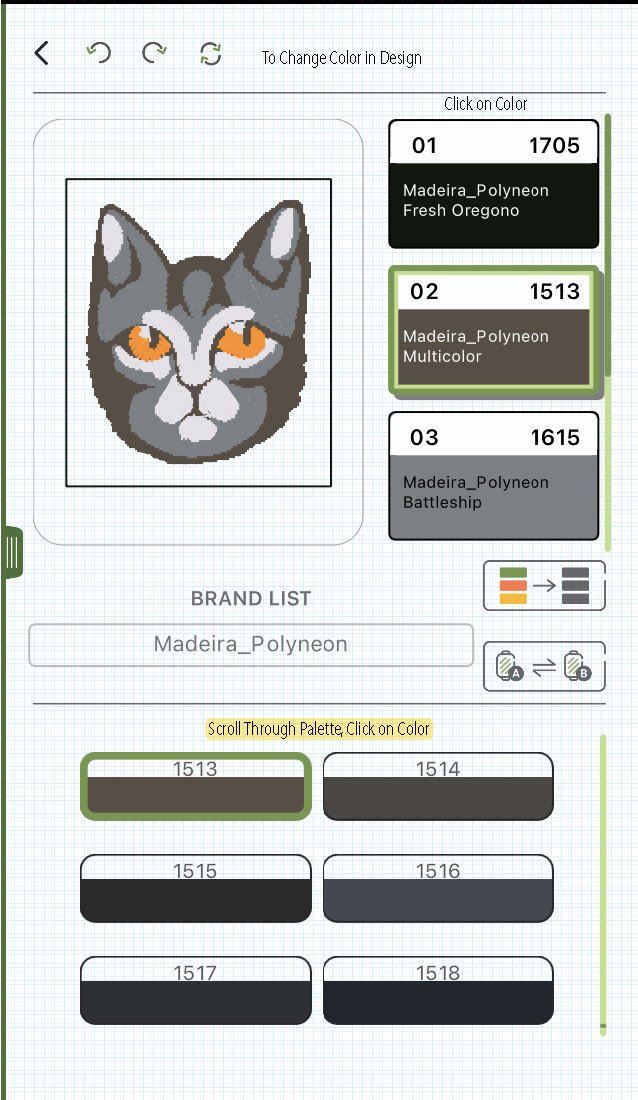
Choosing the Thread Brand and Color
When you click on the “Color” option in the bottom menu you’ll be brought to a screen that allows you to choose the brand of thread you’re using for your project as well as the color of thread you’re using for each portion of your embroidery design. The EverSewn X2 app recognizes multiple brands of thread. Once you select the correct brand, you’ll be able to use that brand’s color codes to get accurate shades on your design preview.

Preparing the Design for Stitching
Tapping on your design will bring up options as shown in the image below. The double headed arrow in the upper right corner allows you to size your design within the hoop. The circular arrow in the bottom right corner allows you to rotate your design. The three dots in the upper left corner open an additional menu, also shown on the image below. The first option in the additional menu groups all of your design components which is necessary if you’ve combined several designs or have added text. The next option on the additional menu allows you to duplicate whatever is selected on your design. The final option in the additional menu deletes your design.

The Stitchout
Finally, you’re ready to send your design to the beautiful Sparrow X2 machine sitting in front of you. To do so, tap the sewing machine icon in the upper right corner. Your design will start to transfer and then you’ll see the screen below for the duration of the stitchout. A few things of note, you can advance the stitching process by stitch or by color. This is the time to sit back and watch your machine go to work stitching out your beautiful design!
