
Get Sewing: How to Wind a Bobbin
/You’ve got your DIY project ready, you’re all set to make something really cute and crafty, and you’re staring at your sewing machine wondering what happens first. At EverSewn, we recognize that accomplishing setting up your machine is more than half the battle, so we welcome you to our series “Get Sewing.” We’ll walk you through all the setup steps and will be here for reference until it all becomes old hat.
In this article, we’ll walk you through winding your bobbin. As always, please also refer to the manual for your specific machine. Many of the concepts are the same for any sewing machine, but there may be some slight differences (we’ll save you some time - find your EverSewn sewing machine manual by clicking the button below). A quick tip - you can wind bobbins with thread colors you plan to use most often and store your ready-to-go bobbins in a handy EverSewn Bobbin Nest!

STEP 1: Bobbin Winding Prep
Let’s make sure your machine is set up and ready for you to wind your bobbin. Remove the bobbin from the casing and make sure your needle is in the top position. It’s best to start with an empty bobbin, so make sure any existing thread has been removed.
EverSewn machines use class 15 bobbins. Stock up and have several on hand so you can wind all those often-used colors!
STEP 2: Placing Your Spool
Place the thread and spool holder onto the spool pin. For larger spools of thread, place the large side of the spool holder toward the spool. For smaller spools of thread, place the small side of the spool holder toward the spool, or use the small spool holder. If the thread spool has a thread retaining slit, place this end of the spool toward the right so the thread doesn't get caught while winding the bobbin.
This is a good time to talk about two different types of spools of thread - cross wound and stacked. In short, if you have a spool of thread that is cross wound (the thread forms a zig-zag or X pattern on the spool) it should be placed on your machine using the horizontal spool pin so that the thread comes off the top of the spool. If you have a spool of thread that is stacked (the thread runs smoothly in parallel to the spool) it should be placed on your machine using the vertical spool pin so that the thread comes off the spool at a right angle. Made to Sew has an article that explains the differences in stacked versus cross wound spools in greater detail.

STEP 3: Thread Guide
Snap the thread into the thread guide. This will keep your thread locked in place during the winding process. Don’t skip this step!

STEP 4: Tension Disks
Grab the end of your thread and wind it counter-clockwise around the bobbin winder tension disks. Make sure your thread snaps into place on the tension disks. If the thread doesn’t fully click into place, it will cause your bobbin to wind loosely and unevenly.

STEP 5: Prepping The Empty Bobbin
After winding your thread around the bobbin winder tension disks, place the thread end through one of the inner holes in the bobbin and place your empty bobbin on the spindle. Once you’ve placed your bobbin on the spindle, push the bobbin to the right. Now you’re ready to start winding!

STEP 6: Winding Your Bobbin
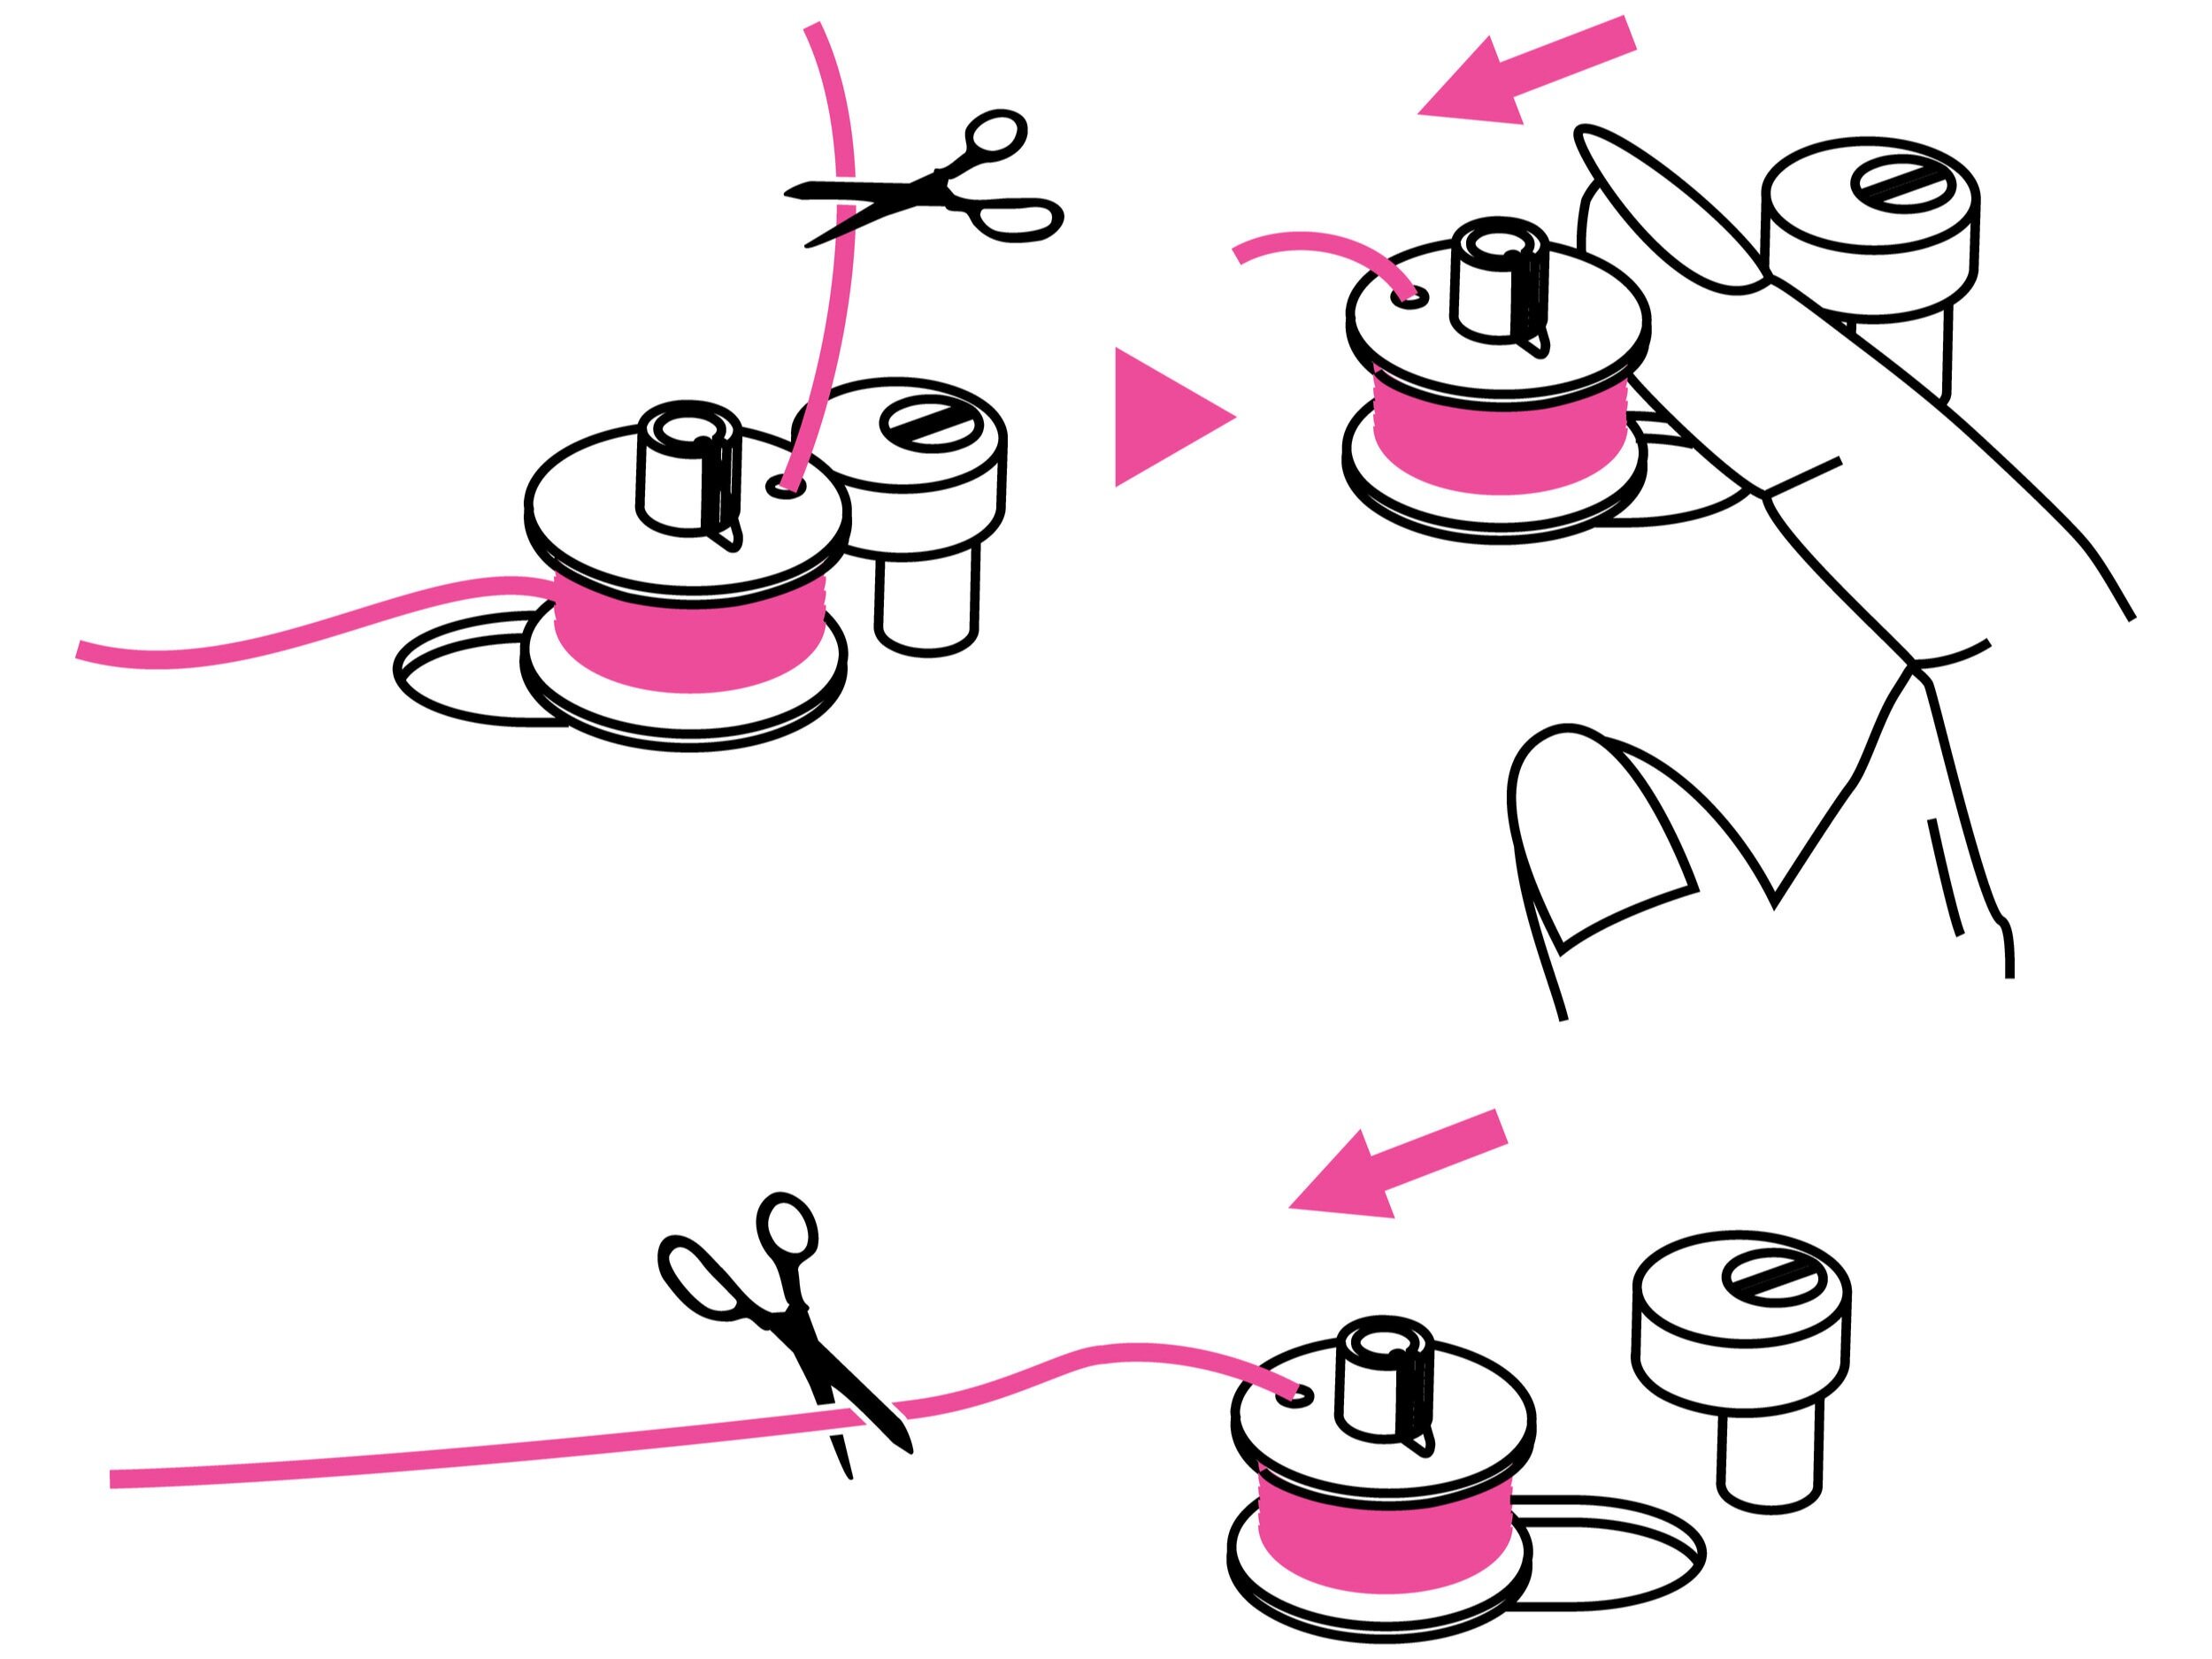
Hold the thread tail securely in one hand and press the start/stop button or the foot control. After the bobbin has wound a few turns, stop the machine and cut the thread near the hole of the bobbin. Continue winding the bobbin until it is full.
NOTE - this is not a race. Slow and steady is best when winding your bobbin! Depending on your machine, the motor may stop automatically when the bobbin is full or it may just noticeably slow as your bobbin fills up with thread.
Once you’re done winding, push the bobbin winder spindle to left and cut the thread. Make sure your bobbin is wound smoothly and evenly. There shouldn’t be any thread bubbling out of the side of the bobbin. The thread tail should be trimmed very close to the bobbin. Paying attention to these final details will ensure a smooth sewing experience! Remove your newly wound bobbin and get ready to thread your machine! Not sure how to thread your machine? We’ve got you covered with our next Get Sewing: How to Thread a Sewing Machine post!